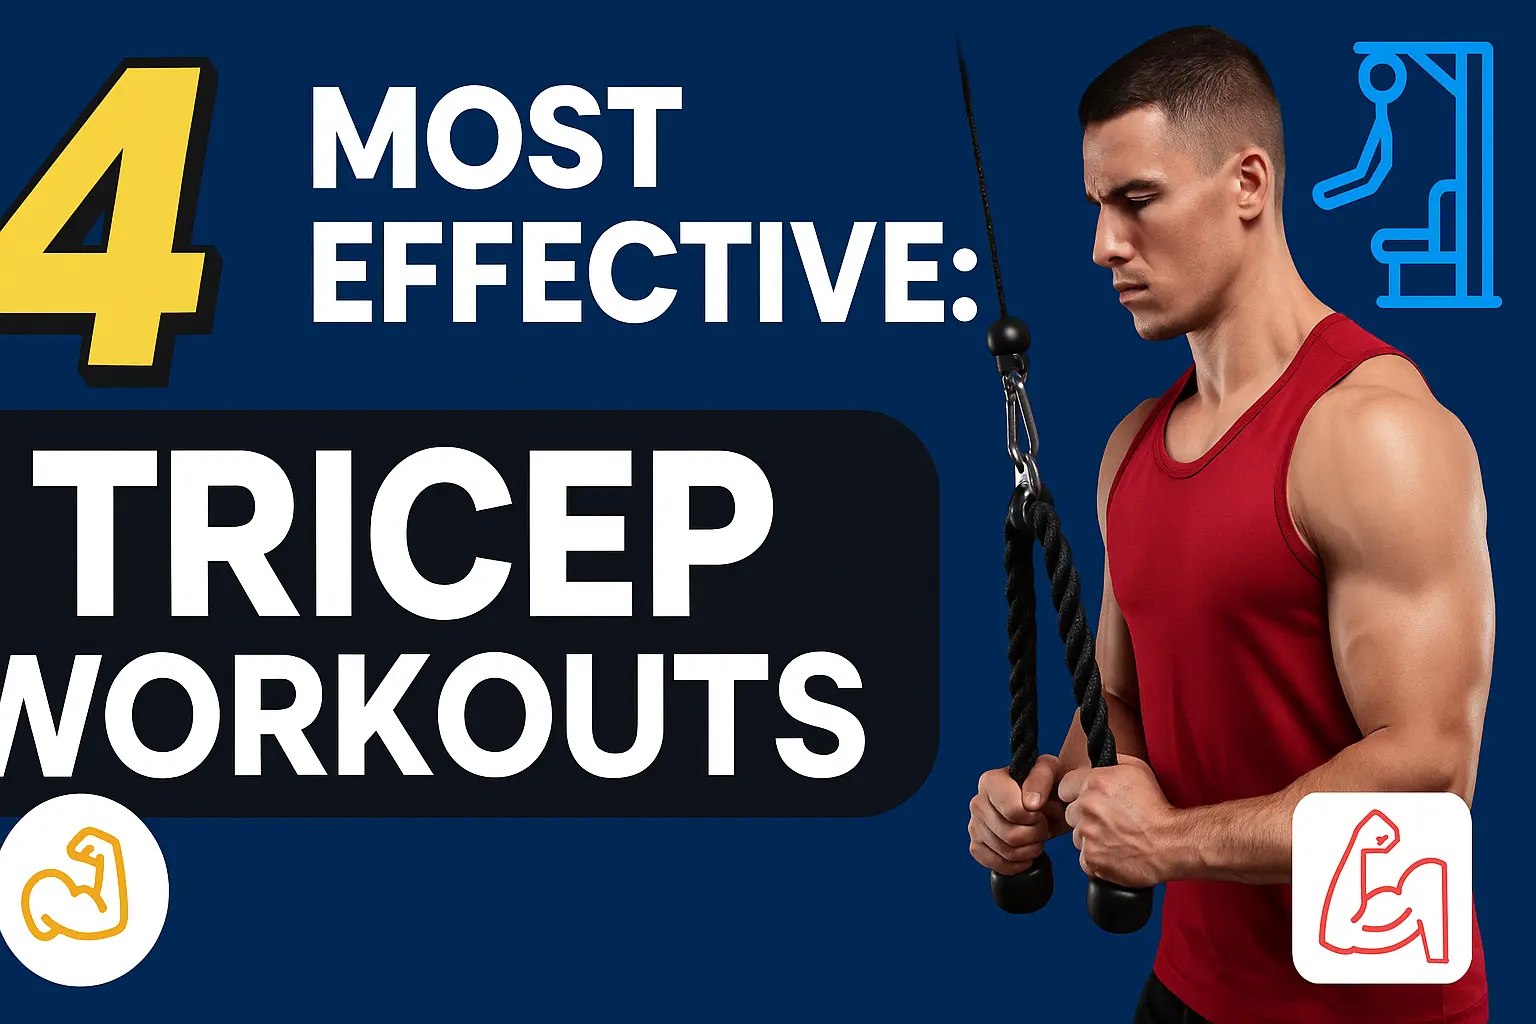

Walk into any gym or observe home workout videos online, and you will witness one of the most widely butchered exercises in all of fitness: the Dumbbell Tricep Kickback. In its ideal biomechanical execution, the kickback is a surgical isolation movement designed to place maximum contraction tension across the outer Lateral Head (the horseshoe sweep) exactly at the top horizontal lockout where your arm is bolt straight behind your torso. However, more than 90 percent of exercisers turn the kickback into a swinging, momentum-driven pendulum. They grab a weight that is twice as heavy as they can actually control, drop their elbow toward the floor, and violently swing the dumbbell backward using shoulder and lower back momentum before letting it fall slack at the bottom. This swinging destroys tricep time-under-tension and places zero growth stimulus across the muscle fibers. By mastering our strict dumbbell kickback form check and eliminating momentum forever, you can use light household water bottles or dumbbells to carve out razor-sharp horseshoe striations at home.
Mastering dumbbell kickback form requires an uncompromising commitment to understanding human biomechanics, optimal training protocols, and evidence-based nutritional strategies. Many home fitness enthusiasts fall victim to commercial shortcuts or misleading advice, yet the actual biological pathways governing physical development follow precise scientific rules that, when understood and applied correctly, produce extraordinary and lasting results.
Throughout this comprehensive guide on dumbbell kickback form, we will dismantle prevalent fitness myths and provide you with an actionable, step-by-step framework tailored specifically for the Indian lifestyle. Whether your goal is to build massive muscle, fix postural imbalances, overcome training plateaus, or prevent joint injuries, every single instruction detailed below is backed by clinical research and proven athletic protocols used by elite strength coaches and physiotherapists.
Before initiating any intensive protocol for dumbbell kickback form, it is essential to establish baseline metrics and eliminate daily environmental habits that actively limit your development or recovery. By combining strict nutritional saturation, consistent training routines, and optimized recovery practices, you empower your body to express its maximum genetic and epigenetic potential without risk of injury or overtraining syndrome.
The Physics of the Kickback: Why Upper-Arm Parallel Alignment Is Everything
To understand why swinging momentum makes the kickback completely useless for muscle growth, you must analyze gravity vectors and elbow joint mechanics. When you hold a dumbbell, gravity pulls directly straight down toward the floor with 100 percent vertical force. During a tricep kickback, your tricep muscle works by extending your forearm backward at the elbow joint.
If your upper arm bone (humerus) is allowed to drop down at a 45-degree angle pointing toward the carpet, the moment you straighten your elbow, the dumbbell is barely moving horizontally against gravity — your tricep experiences less than 30 percent of the actual weight resistance. Only when your upper arm bone is rowed high up alongside your ribcage and locked perfectly horizontal and parallel to the floor does gravity create maximum perpendicular resistance against your forearm as you extend backward. When your upper arm is locked parallel, straightening your elbow forces your lateral horseshoe head to contract with 100 percent maximum electrical intensity against vertical gravity.

The Horizontal Humerus Gravity Vector Rule
To fully execute The Horizontal Humerus Gravity Vector Rule effectively, you must maintain uncompromised technical discipline and understand the underlying physiological mechanism. Why your upper arm bone must be locked perfectly parallel to the floor so extending your elbow works directly against gravity. When executed consistently over a 60-to-90-day training cycle, this specific protocol forces profound structural adaptation, strengthening the surrounding connective tissues, improving localized vascularity, and enhancing neuromuscular coordination across the target muscle groups.
Furthermore, integrating The Horizontal Humerus Gravity Vector Rule into your daily routine provides a direct competitive advantage over generic training programs. By focusing on progressive overload, strict time-under-tension, and optimal joint alignment during dumbbell kickback form, you eliminate common biomechanical bottlenecks and accelerate your body natural recovery capacity. Ensure that every repetition or static hold is performed with deliberate breathing and full range of motion to capture 100% of the anatomical benefits.
Why Dropping Your Elbow 45 Degrees Destroys Tension
To fully execute Why Dropping Your Elbow 45 Degrees Destroys Tension effectively, you must maintain uncompromised technical discipline and understand the underlying physiological mechanism. How allowing your elbow to sag toward the carpet reduces tricep mechanical torque by 70 percent across the entire repetition. When executed consistently over a 60-to-90-day training cycle, this specific protocol forces profound structural adaptation, strengthening the surrounding connective tissues, improving localized vascularity, and enhancing neuromuscular coordination across the target muscle groups.
Furthermore, integrating Why Dropping Your Elbow 45 Degrees Destroys Tension into your daily routine provides a direct competitive advantage over generic training programs. By focusing on progressive overload, strict time-under-tension, and optimal joint alignment during dumbbell kickback form, you eliminate common biomechanical bottlenecks and accelerate your body natural recovery capacity. Ensure that every repetition or static hold is performed with deliberate breathing and full range of motion to capture 100% of the anatomical benefits.
Eliminating Shoulder Extension Pendulum Swinging
To fully execute Eliminating Shoulder Extension Pendulum Swinging effectively, you must maintain uncompromised technical discipline and understand the underlying physiological mechanism. Locking your shoulder joint completely motionless so your arm does not swing forward and backward like a grandfather clock. When executed consistently over a 60-to-90-day training cycle, this specific protocol forces profound structural adaptation, strengthening the surrounding connective tissues, improving localized vascularity, and enhancing neuromuscular coordination across the target muscle groups.
Furthermore, integrating Eliminating Shoulder Extension Pendulum Swinging into your daily routine provides a direct competitive advantage over generic training programs. By focusing on progressive overload, strict time-under-tension, and optimal joint alignment during dumbbell kickback form, you eliminate common biomechanical bottlenecks and accelerate your body natural recovery capacity. Ensure that every repetition or static hold is performed with deliberate breathing and full range of motion to capture 100% of the anatomical benefits.
The 4-Step Flawless Kickback Form Check Checklist
To execute the dumbbell or water-jug kickback with surgical precision and eliminate swinging momentum forever, memorize and strictly enforce our 4-Step Flawless Kickback Checklist before every single set right in your living room.
Step 1: The 3-Point Bench/Table Anchor — place your left knee and left palm flat across a sturdy dining chair or bench, keeping your spine flat and neutral like a tabletop parallel to the floor. Grasp a light 5-to-8 kilogram dumbbell or water bottle in your right hand. Step 2: The Parallel Upper-Arm Lock — row your right elbow straight upward behind your back until your right upper arm bone is wedged tightly against your right side ribcage and locked perfectly parallel to the floor. Freeze your shoulder joint motionless; your upper arm will not move a single millimeter for the rest of the set. Step 3: Strict Horizontal Extension — keeping your upper arm frozen parallel, smoothly straighten your right elbow over 2 seconds, pushing the dumbbell straight backward until your forearm aligns perfectly with your upper arm. Step 4: The 2-Second Peak Squeeze — hold this top horizontal lockout motionless for 2 strict seconds, squeezing your outer horseshoe until it cramps, before lowering slowly over 3 seconds back to a 90-degree elbow bend.

Step 1: 3-Point Table/Chair Spine Anchoring
To fully execute Step 1: 3-Point Table/Chair Spine Anchoring effectively, you must maintain uncompromised technical discipline and understand the underlying physiological mechanism. Resting one knee and palm on a dining chair to support your lumbar spine and keep your torso locked parallel to the floor. When executed consistently over a 60-to-90-day training cycle, this specific protocol forces profound structural adaptation, strengthening the surrounding connective tissues, improving localized vascularity, and enhancing neuromuscular coordination across the target muscle groups.
Furthermore, integrating Step 1: 3-Point Table/Chair Spine Anchoring into your daily routine provides a direct competitive advantage over generic training programs. By focusing on progressive overload, strict time-under-tension, and optimal joint alignment during dumbbell kickback form, you eliminate common biomechanical bottlenecks and accelerate your body natural recovery capacity. Ensure that every repetition or static hold is performed with deliberate breathing and full range of motion to capture 100% of the anatomical benefits.
Step 2: Freezing the Upper Arm at Ribcage Height
To fully execute Step 2: Freezing the Upper Arm at Ribcage Height effectively, you must maintain uncompromised technical discipline and understand the underlying physiological mechanism. Rowing your elbow high alongside your ribs and locking your shoulder joint completely motionless before extending. When executed consistently over a 60-to-90-day training cycle, this specific protocol forces profound structural adaptation, strengthening the surrounding connective tissues, improving localized vascularity, and enhancing neuromuscular coordination across the target muscle groups.
Furthermore, integrating Step 2: Freezing the Upper Arm at Ribcage Height into your daily routine provides a direct competitive advantage over generic training programs. By focusing on progressive overload, strict time-under-tension, and optimal joint alignment during dumbbell kickback form, you eliminate common biomechanical bottlenecks and accelerate your body natural recovery capacity. Ensure that every repetition or static hold is performed with deliberate breathing and full range of motion to capture 100% of the anatomical benefits.
Step 3 & 4: Strict 2-Second Concentric to 2-Second Hold
To fully execute Step 3 & 4: Strict 2-Second Concentric to 2-Second Hold effectively, you must maintain uncompromised technical discipline and understand the underlying physiological mechanism. Straightening your elbow smoothly over 2 seconds and holding the top horizontal lockout motionless for 2 strict seconds. When executed consistently over a 60-to-90-day training cycle, this specific protocol forces profound structural adaptation, strengthening the surrounding connective tissues, improving localized vascularity, and enhancing neuromuscular coordination across the target muscle groups.
Furthermore, integrating Step 3 & 4: Strict 2-Second Concentric to 2-Second Hold into your daily routine provides a direct competitive advantage over generic training programs. By focusing on progressive overload, strict time-under-tension, and optimal joint alignment during dumbbell kickback form, you eliminate common biomechanical bottlenecks and accelerate your body natural recovery capacity. Ensure that every repetition or static hold is performed with deliberate breathing and full range of motion to capture 100% of the anatomical benefits.
Fixing the Top 3 Kickback Errors: Swinging, Dropping & Over-Weighting
If your triceps are not screaming with intense metabolic burn within 10 repetitions of a kickback, you are committing one of three classic biomechanical errors: The Momentum Swing, The Bottom Drop, or Ego Over-Weighting.
Error 1 is The Momentum Swing: using your front deltoid to swing the dumbbell forward past your hip at the bottom, and then using that swinging momentum to fling the weight backward without tricep effort. Fix this instantly by stopping every lowering descent exactly when your elbow reaches a 90-degree right angle pointing straight down. Error 2 is The Bottom Drop: letting your elbow drop down toward the carpet as you straighten your arm because the weight is too heavy. Error 3 is Ego Over-Weighting: grabbing a 15-kilogram dumbbell that requires full-body jerking to move. Drop your dumbbell weight by 50 percent down to a light 5-kilogram water bottle and enforce the 2-second top pause — the muscle burn and growth will be ten times greater.
The 90-Degree Bottom Stop-Point Enforcement
To fully execute The 90-Degree Bottom Stop-Point Enforcement effectively, you must maintain uncompromised technical discipline and understand the underlying physiological mechanism. Stopping every lowering repetition when your elbow forms a 90-degree right angle to prevent forward swinging momentum. When executed consistently over a 60-to-90-day training cycle, this specific protocol forces profound structural adaptation, strengthening the surrounding connective tissues, improving localized vascularity, and enhancing neuromuscular coordination across the target muscle groups.
Furthermore, integrating The 90-Degree Bottom Stop-Point Enforcement into your daily routine provides a direct competitive advantage over generic training programs. By focusing on progressive overload, strict time-under-tension, and optimal joint alignment during dumbbell kickback form, you eliminate common biomechanical bottlenecks and accelerate your body natural recovery capacity. Ensure that every repetition or static hold is performed with deliberate breathing and full range of motion to capture 100% of the anatomical benefits.
Eliminating Ego Over-Weighting (<8 Kilograms)
To fully execute Eliminating Ego Over-Weighting (<8 Kilograms) effectively, you must maintain uncompromised technical discipline and understand the underlying physiological mechanism. Why using light 5kg to 8kg dumbbells with a 2-second top pause builds twice as much horseshoe striation as swinging 15kg weights. When executed consistently over a 60-to-90-day training cycle, this specific protocol forces profound structural adaptation, strengthening the surrounding connective tissues, improving localized vascularity, and enhancing neuromuscular coordination across the target muscle groups.
Furthermore, integrating Eliminating Ego Over-Weighting (<8 Kilograms) into your daily routine provides a direct competitive advantage over generic training programs. By focusing on progressive overload, strict time-under-tension, and optimal joint alignment during dumbbell kickback form, you eliminate common biomechanical bottlenecks and accelerate your body natural recovery capacity. Ensure that every repetition or static hold is performed with deliberate breathing and full range of motion to capture 100% of the anatomical benefits.
Mirror Alignment Check at Home
To fully execute Mirror Alignment Check at Home effectively, you must maintain uncompromised technical discipline and understand the underlying physiological mechanism. Performing kickbacks sideways in front of a bedroom mirror to visually verify that your upper arm bone never drops below parallel. When executed consistently over a 60-to-90-day training cycle, this specific protocol forces profound structural adaptation, strengthening the surrounding connective tissues, improving localized vascularity, and enhancing neuromuscular coordination across the target muscle groups.
Furthermore, integrating Mirror Alignment Check at Home into your daily routine provides a direct competitive advantage over generic training programs. By focusing on progressive overload, strict time-under-tension, and optimal joint alignment during dumbbell kickback form, you eliminate common biomechanical bottlenecks and accelerate your body natural recovery capacity. Ensure that every repetition or static hold is performed with deliberate breathing and full range of motion to capture 100% of the anatomical benefits.
Resistance Band & Cable-Simulation Kickbacks: Ascending Tension Mastery
While strict dumbbell kickbacks are phenomenal, free weights still possess one inherent gravitational flaw: when your elbow is bent at 90 degrees at the bottom start position, gravity pulls straight through your forearm bones, and tricep tension is low. By attaching a resistance band loop to a low doorframe or anchoring it beneath your front foot, you upgrade your kickback with Linear Variable Resistance.
Step your right foot squarely onto the center of a light resistance band loop and hold the top loop in your right hand. Assume your 3-point bench stance and row your right upper arm high and parallel to the floor. As you extend your right hand straight backward against the stretching band, the elastic tension smoothly increases from 3 kilograms at the bottom 90-degree start all the way up to 12 kilograms right at the top horizontal lockout. This ascending tension curve provides continuous, unbroken resistance across every single millimeter of the repetition arc, forcing total motor unit exhaustion across the lateral horseshoe.

Band Foot-Anchor Ascending Tension Curve
To fully execute Band Foot-Anchor Ascending Tension Curve effectively, you must maintain uncompromised technical discipline and understand the underlying physiological mechanism. Securing a resistance band under your front foot to create smooth tension that increases up to 12kg at peak horizontal lockout. When executed consistently over a 60-to-90-day training cycle, this specific protocol forces profound structural adaptation, strengthening the surrounding connective tissues, improving localized vascularity, and enhancing neuromuscular coordination across the target muscle groups.
Furthermore, integrating Band Foot-Anchor Ascending Tension Curve into your daily routine provides a direct competitive advantage over generic training programs. By focusing on progressive overload, strict time-under-tension, and optimal joint alignment during dumbbell kickback form, you eliminate common biomechanical bottlenecks and accelerate your body natural recovery capacity. Ensure that every repetition or static hold is performed with deliberate breathing and full range of motion to capture 100% of the anatomical benefits.
Combining Dumbbell & Band Superset Overload
To fully execute Combining Dumbbell & Band Superset Overload effectively, you must maintain uncompromised technical discipline and understand the underlying physiological mechanism. Performing 12 strict dumbbell kickbacks immediately followed back-to-back with 15 band kickbacks for ultimate horseshoe pumping. When executed consistently over a 60-to-90-day training cycle, this specific protocol forces profound structural adaptation, strengthening the surrounding connective tissues, improving localized vascularity, and enhancing neuromuscular coordination across the target muscle groups.
Furthermore, integrating Combining Dumbbell & Band Superset Overload into your daily routine provides a direct competitive advantage over generic training programs. By focusing on progressive overload, strict time-under-tension, and optimal joint alignment during dumbbell kickback form, you eliminate common biomechanical bottlenecks and accelerate your body natural recovery capacity. Ensure that every repetition or static hold is performed with deliberate breathing and full range of motion to capture 100% of the anatomical benefits.
Rotational Wrist Twist at Peak Lockout
To fully execute Rotational Wrist Twist at Peak Lockout effectively, you must maintain uncompromised technical discipline and understand the underlying physiological mechanism. Turning your palm up toward the ceiling slightly during the final 2 inches of backward extension to double lateral head firing. When executed consistently over a 60-to-90-day training cycle, this specific protocol forces profound structural adaptation, strengthening the surrounding connective tissues, improving localized vascularity, and enhancing neuromuscular coordination across the target muscle groups.
Furthermore, integrating Rotational Wrist Twist at Peak Lockout into your daily routine provides a direct competitive advantage over generic training programs. By focusing on progressive overload, strict time-under-tension, and optimal joint alignment during dumbbell kickback form, you eliminate common biomechanical bottlenecks and accelerate your body natural recovery capacity. Ensure that every repetition or static hold is performed with deliberate breathing and full range of motion to capture 100% of the anatomical benefits.
The Complete 25-Minute Peak Contraction Kickback Routine
To incorporate flawless, momentum-free kickbacks inside a targeted home routine that carves out razor-sharp horseshoe striations, perform this 25-minute session exactly 2 days per week (for example, at the end of your home chest or arm workouts). You will need one light dumbbell (or water bottle), one light resistance band, and your dining chair.
Master Routine Flow: Exercise 1: Single-Arm Strict Dumbbell/Water-Jug Kickbacks with 2-second top horizontal squeeze — 4 sets of 12 strict reps per arm (rest 45s between arms); Exercise 2: Single-Arm Banded Kickbacks (anchored under foot) — 4 sets of 15 continuous reps with 1-second top squeeze (rest 45s between arms); Exercise 3: Two-Handed Prone Incline Kickbacks (lying face down across a 45-degree tilted dining bench or couch edge and kicking both dumbbells backward simultaneously) — 3 sets of 15 strict reps (rest 60s); Exercise 4: Floor Diamond Pushups — 2 all-out burnout sets of 20 reps to pump the lateral head to absolute failure (rest 60s). Your horseshoe tricep definition will be astonishing.

Chronological 4-Stage Kickback & Diamond Flow
To fully execute Chronological 4-Stage Kickback & Diamond Flow effectively, you must maintain uncompromised technical discipline and understand the underlying physiological mechanism. Combining strict single-arm dumbbell kickbacks, ascending band kickbacks, dual-arm prone kickbacks, and diamond burnouts. When executed consistently over a 60-to-90-day training cycle, this specific protocol forces profound structural adaptation, strengthening the surrounding connective tissues, improving localized vascularity, and enhancing neuromuscular coordination across the target muscle groups.
Furthermore, integrating Chronological 4-Stage Kickback & Diamond Flow into your daily routine provides a direct competitive advantage over generic training programs. By focusing on progressive overload, strict time-under-tension, and optimal joint alignment during dumbbell kickback form, you eliminate common biomechanical bottlenecks and accelerate your body natural recovery capacity. Ensure that every repetition or static hold is performed with deliberate breathing and full range of motion to capture 100% of the anatomical benefits.
Strict Tempo & Time-Under-Tension Enforcement
To fully execute Strict Tempo & Time-Under-Tension Enforcement effectively, you must maintain uncompromised technical discipline and understand the underlying physiological mechanism. Holding every single kickback repetition motionless for 2 strict seconds at top lockout before lowering over 3 seconds. When executed consistently over a 60-to-90-day training cycle, this specific protocol forces profound structural adaptation, strengthening the surrounding connective tissues, improving localized vascularity, and enhancing neuromuscular coordination across the target muscle groups.
Furthermore, integrating Strict Tempo & Time-Under-Tension Enforcement into your daily routine provides a direct competitive advantage over generic training programs. By focusing on progressive overload, strict time-under-tension, and optimal joint alignment during dumbbell kickback form, you eliminate common biomechanical bottlenecks and accelerate your body natural recovery capacity. Ensure that every repetition or static hold is performed with deliberate breathing and full range of motion to capture 100% of the anatomical benefits.
Progressive Weekly Repetition Tracking
To fully execute Progressive Weekly Repetition Tracking effectively, you must maintain uncompromised technical discipline and understand the underlying physiological mechanism. Recording exact repetition numbers weekly across all kickback variations to verify progressive overload as your arms expand. When executed consistently over a 60-to-90-day training cycle, this specific protocol forces profound structural adaptation, strengthening the surrounding connective tissues, improving localized vascularity, and enhancing neuromuscular coordination across the target muscle groups.
Furthermore, integrating Progressive Weekly Repetition Tracking into your daily routine provides a direct competitive advantage over generic training programs. By focusing on progressive overload, strict time-under-tension, and optimal joint alignment during dumbbell kickback form, you eliminate common biomechanical bottlenecks and accelerate your body natural recovery capacity. Ensure that every repetition or static hold is performed with deliberate breathing and full range of motion to capture 100% of the anatomical benefits.
Indian High-Protein Nutrition for Peak Kickback Remodeling
Because momentum-free kickbacks subject the outer lateral horseshoe head to intense peak contraction holding under high metabolic ischemia, your upper arm fibers undergo extensive Z-disc micro-trauma and glycogen depletion. If your daily protein and caloric intake falls short, your body will break down existing arm tissue rather than synthesizing thicker myofibrillar proteins.
Within 45 minutes post-workout, consume a large recovery shake: 300ml whole milk blended with 1.5 scoops of whey protein, 2 bananas, and 1 tablespoon of peanut butter (delivering 45g complete protein and simple sugars to halt catabolism instantly). For dinner, consume 300g of organic homemade paneer curry or chicken breast paired with 3 cups of white rice, yellow dal, and fresh green spinach (palak) to fully replenish intramuscular glycogen and drive rapid tricep horseshoe expansion overnight.

The 45-Minute Post-Workout Whey & Banana Shake
To fully execute The 45-Minute Post-Workout Whey & Banana Shake effectively, you must maintain uncompromised technical discipline and understand the underlying physiological mechanism. Shuttling fast-absorbing whey protein and simple sugars into damaged tricep fibers within the peak anabolic window. When executed consistently over a 60-to-90-day training cycle, this specific protocol forces profound structural adaptation, strengthening the surrounding connective tissues, improving localized vascularity, and enhancing neuromuscular coordination across the target muscle groups.
Furthermore, integrating The 45-Minute Post-Workout Whey & Banana Shake into your daily routine provides a direct competitive advantage over generic training programs. By focusing on progressive overload, strict time-under-tension, and optimal joint alignment during dumbbell kickback form, you eliminate common biomechanical bottlenecks and accelerate your body natural recovery capacity. Ensure that every repetition or static hold is performed with deliberate breathing and full range of motion to capture 100% of the anatomical benefits.
High-Calorie Paneer & White Rice Dinner Matrix
To fully execute High-Calorie Paneer & White Rice Dinner Matrix effectively, you must maintain uncompromised technical discipline and understand the underlying physiological mechanism. Utilizing traditional Indian dairy protein paired with easily digestible white rice to completely restore upper arm glycogen. When executed consistently over a 60-to-90-day training cycle, this specific protocol forces profound structural adaptation, strengthening the surrounding connective tissues, improving localized vascularity, and enhancing neuromuscular coordination across the target muscle groups.
Furthermore, integrating High-Calorie Paneer & White Rice Dinner Matrix into your daily routine provides a direct competitive advantage over generic training programs. By focusing on progressive overload, strict time-under-tension, and optimal joint alignment during dumbbell kickback form, you eliminate common biomechanical bottlenecks and accelerate your body natural recovery capacity. Ensure that every repetition or static hold is performed with deliberate breathing and full range of motion to capture 100% of the anatomical benefits.
Creatine Monohydrate for Upper Arm Sarcoplasmic Volume
To fully execute Creatine Monohydrate for Upper Arm Sarcoplasmic Volume effectively, you must maintain uncompromised technical discipline and understand the underlying physiological mechanism. Consuming 5 grams of daily creatine to pull water volume directly into all three tricep heads, adding immediate visible arm size. When executed consistently over a 60-to-90-day training cycle, this specific protocol forces profound structural adaptation, strengthening the surrounding connective tissues, improving localized vascularity, and enhancing neuromuscular coordination across the target muscle groups.
Furthermore, integrating Creatine Monohydrate for Upper Arm Sarcoplasmic Volume into your daily routine provides a direct competitive advantage over generic training programs. By focusing on progressive overload, strict time-under-tension, and optimal joint alignment during dumbbell kickback form, you eliminate common biomechanical bottlenecks and accelerate your body natural recovery capacity. Ensure that every repetition or static hold is performed with deliberate breathing and full range of motion to capture 100% of the anatomical benefits.

Frequently Asked Questions (FAQs) About Dumbbell Kickback Form
Why do my shoulders and lower back ache after performing dumbbell kickbacks?
Shoulder and lower back ache during kickbacks indicates that your upper arm bone is dropping below parallel and you are violently swinging your torso forward and backward to fling the weight up. Support one knee and palm across a sturdy dining chair and lock your upper arm frozen parallel to the floor. By strictly following the biomechanical principles and nutritional guidelines detailed in this guide on dumbbell kickback form, you can safely achieve rapid, noticeable improvements while protecting your long-term joint health.
How heavy should my dumbbells be when executing strict 2-second pause kickbacks?
Because strict kickbacks require holding the weight horizontal against gravity with pure tricep extension, you must use light dumbbells between 4 kilograms and 8 kilograms (or 5-liter water bottles). Any weight heavier than 10 kilograms almost always forces swinging momentum cheating. By strictly following the biomechanical principles and nutritional guidelines detailed in this guide on dumbbell kickback form, you can safely achieve rapid, noticeable improvements while protecting your long-term joint health.
Can I perform kickbacks with both arms at the same time while bending over?
While standing bent-over dual-arm kickbacks can be done, they place unnecessary isometric shear stress on your lower back. Performing Single-Arm Kickbacks with your opposite knee supported across a dining chair is significantly safer and allows 100 percent mental focus on one tricep at a time. By strictly following the biomechanical principles and nutritional guidelines detailed in this guide on dumbbell kickback form, you can safely achieve rapid, noticeable improvements while protecting your long-term joint health.
What is the difference between a dumbbell kickback and a dumbbell skull crusher?
A dumbbell skull crusher involves lying flat on your back or across a bench and lowering weights toward your forehead to stretch the triceps long head and medial head. A kickback involves bending over and extending your arm backward behind your hip to isolate peak contraction across the lateral horseshoe. By strictly following the biomechanical principles and nutritional guidelines detailed in this guide on dumbbell kickback form, you can safely achieve rapid, noticeable improvements while protecting your long-term joint health.
Should I turn my palm up or down at the top horizontal lockout of a kickback?
For standard kickbacks, keep your palm facing inward toward your body (neutral hammer grip). To add an advanced peak contraction twist, smoothly rotate your wrist as you extend backward so your palm faces up toward the ceiling at full lockout — this doubles lateral horseshoe fiber activation. By strictly following the biomechanical principles and nutritional guidelines detailed in this guide on dumbbell kickback form, you can safely achieve rapid, noticeable improvements while protecting your long-term joint health.