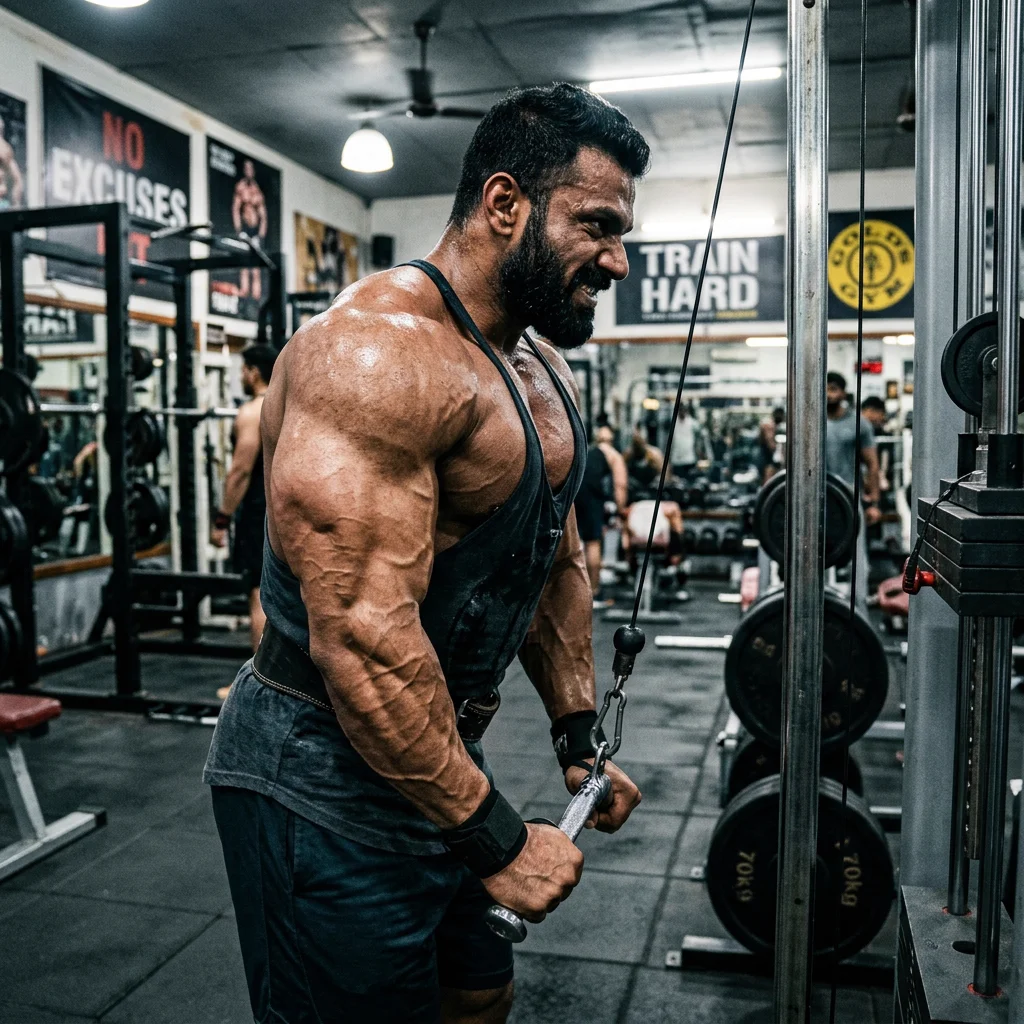

Mastering resistance band tricep is essential for achieving peak physical transformation. When training at home without commercial gym machinery or heavy dumbbells, high-tension elastic resistance bands (both 41-inch power loop bands and handled tube bands) emerge as the ultimate scientific weapon for building dense, striated horseshoe triceps. While free weights rely entirely on gravity and lose resistance at the top lockout of arm exercises, resistance bands provide Linear Variable Resistance — meaning the elastic tension increases exponentially as the band stretches further at the bottom of a pushdown or the back of a kickback where your tricep muscles are mechanically at their strongest. By mastering a complete resistance band tricep pushdown and kickback routine anchored to a top doorframe or household pull-up bar, you can subject your lateral, long, and medial tricep heads to peak contraction overload and cellular ischemia that rivals or exceeds commercial gym cable stations.
Mastering band tricep pushdown requires an uncompromising commitment to understanding human biomechanics, optimal training protocols, and evidence-based nutritional strategies. Many home fitness enthusiasts fall victim to commercial shortcuts or misleading advice, yet the actual biological pathways governing physical development follow precise scientific rules that, when understood and applied correctly, produce extraordinary and lasting results.
Throughout this comprehensive guide on band tricep pushdown, we will dismantle prevalent fitness myths and provide you with an actionable, step-by-step framework tailored specifically for the Indian lifestyle. Whether your goal is to build massive muscle, fix postural imbalances, overcome training plateaus, or prevent joint injuries, every single instruction detailed below is backed by clinical research and proven athletic protocols used by elite strength coaches and physiotherapists.
Before initiating any intensive protocol for band tricep pushdown, it is essential to establish baseline metrics and eliminate daily environmental habits that actively limit your development or recovery. By combining strict nutritional saturation, consistent training routines, and optimized recovery practices, you empower your body to express its maximum genetic and epigenetic potential without risk of injury or overtraining syndrome.
Resistance Band Tricep: Linear Variable Resistance vs. Cable & Iron Resistance Curves
To understand why resistance bands build elite upper arm separation and horseshoe striations at home, you must analyze the physics of the Linear Variable Resistance curve. When you perform a dumbbell kickback or barbell skull crusher, the resistance is dictated by gravity pulling straight down toward the center of the earth. At the exact moment your elbow locks out straight, the weight bone-stacks directly over your joint, causing muscular tension across your triceps to drop right to zero.
When you loop a heavy 41-inch purple or black power resistance band over the top of a door anchor or pull-up bar for Band Tricep Pushdowns, the elastic tension is roughly 5 kilograms at the top start position (protecting your elbow capsule when flexed), but smoothly escalates up to 25 or 30 kilograms of heavy, pulling resistance exactly as your hands reach full bottom lockout. This ascending resistance curve perfectly matches your triceps’ natural strength curve, forcing maximum motor unit recruitment across all three heads during the peak contraction squeeze.

Ascending Elastic Pull vs. Flat Gravitational Load
To fully execute Ascending Elastic Pull vs. Flat Gravitational Load effectively, you must maintain uncompromised technical discipline and understand the underlying physiological mechanism. Why elastic bands provide peak resistance exactly at the bottom contraction lockout where your tricep muscles are strongest. When executed consistently over a 60-to-90-day training cycle, this specific protocol forces profound structural adaptation, strengthening the surrounding connective tissues, improving localized vascularity, and enhancing neuromuscular coordination across the target muscle groups.
Furthermore, integrating Ascending Elastic Pull vs. Flat Gravitational Load into your daily routine provides a direct competitive advantage over generic training programs. By focusing on progressive overload, strict time-under-tension, and optimal joint alignment during band tricep pushdown, you eliminate common biomechanical bottlenecks and accelerate your body natural recovery capacity. Ensure that every repetition or static hold is performed with deliberate breathing and full range of motion to capture 100% of the anatomical benefits.
Eliminating the Top-Lockout Resting Point
To fully execute Eliminating the Top-Lockout Resting Point effectively, you must maintain uncompromised technical discipline and understand the underlying physiological mechanism. How continuous elastic snap-back pull prevents your arm muscles from resting at lockout, maintaining high metabolic stress. When executed consistently over a 60-to-90-day training cycle, this specific protocol forces profound structural adaptation, strengthening the surrounding connective tissues, improving localized vascularity, and enhancing neuromuscular coordination across the target muscle groups.
Furthermore, integrating Eliminating the Top-Lockout Resting Point into your daily routine provides a direct competitive advantage over generic training programs. By focusing on progressive overload, strict time-under-tension, and optimal joint alignment during band tricep pushdown, you eliminate common biomechanical bottlenecks and accelerate your body natural recovery capacity. Ensure that every repetition or static hold is performed with deliberate breathing and full range of motion to capture 100% of the anatomical benefits.
Elbow Joint & Tendon Preservation Physics
To fully execute Elbow Joint & Tendon Preservation Physics effectively, you must maintain uncompromised technical discipline and understand the underlying physiological mechanism. Providing lighter tension at deep 90-degree elbow flexion angles to protect delicate tendons while overloading peak extension. When executed consistently over a 60-to-90-day training cycle, this specific protocol forces profound structural adaptation, strengthening the surrounding connective tissues, improving localized vascularity, and enhancing neuromuscular coordination across the target muscle groups.
Furthermore, integrating Elbow Joint & Tendon Preservation Physics into your daily routine provides a direct competitive advantage over generic training programs. By focusing on progressive overload, strict time-under-tension, and optimal joint alignment during band tricep pushdown, you eliminate common biomechanical bottlenecks and accelerate your body natural recovery capacity. Ensure that every repetition or static hold is performed with deliberate breathing and full range of motion to capture 100% of the anatomical benefits.
Anchored Band Tricep Pushdowns: Overhand, Underhand & Rope-Split Variations
The Top-Anchored Band Tricep Pushdown is the absolute foundation of home elastic arm training, recreating the commercial gym cable pulley right in your bedroom doorway. Secure a heavy 41-inch power loop band over a top door anchor, pull-up bar, or sturdy exposed ceiling beam. Grasp the bottom loop of the band with both hands directly in front of your chest with your elbows tucked tightly against your side ribs.
Variation 1 is the Standard Overhand Pushdown (palms facing down): push the band directly toward the floor until your elbows lock bolt straight, holding the peak contraction for 2 strict seconds to ignite the outer lateral horseshoe head. Variation 2 is the Reverse Underhand Pushdown (palms facing up toward the ceiling): gripping the band underhand and pushing straight down shifts heavy mechanical torque onto the deep Medial Head and inner long head. Variation 3 is the Rope-Split Pushdown (grasping the two sides of the band separately like a gym rope): as your hands reach the bottom lockout, split your hands wide outward past your hips, spreading the band apart to create an agonizing, muscle-building peak contraction across the entire horseshoe complex.

Overhand Lateral Head Horseshoe Overload
To fully execute Overhand Lateral Head Horseshoe Overload effectively, you must maintain uncompromised technical discipline and understand the underlying physiological mechanism. Pushing down with palms facing the floor and tucked elbows to concentrate up to 85 percent of torque onto the outer lateral sweep. When executed consistently over a 60-to-90-day training cycle, this specific protocol forces profound structural adaptation, strengthening the surrounding connective tissues, improving localized vascularity, and enhancing neuromuscular coordination across the target muscle groups.
Furthermore, integrating Overhand Lateral Head Horseshoe Overload into your daily routine provides a direct competitive advantage over generic training programs. By focusing on progressive overload, strict time-under-tension, and optimal joint alignment during band tricep pushdown, you eliminate common biomechanical bottlenecks and accelerate your body natural recovery capacity. Ensure that every repetition or static hold is performed with deliberate breathing and full range of motion to capture 100% of the anatomical benefits.
Reverse Underhand Medial Head Activation
To fully execute Reverse Underhand Medial Head Activation effectively, you must maintain uncompromised technical discipline and understand the underlying physiological mechanism. Turning palms upward to eliminate forearm dominance and force the deep third medial head to lock out the final 15 degrees. When executed consistently over a 60-to-90-day training cycle, this specific protocol forces profound structural adaptation, strengthening the surrounding connective tissues, improving localized vascularity, and enhancing neuromuscular coordination across the target muscle groups.
Furthermore, integrating Reverse Underhand Medial Head Activation into your daily routine provides a direct competitive advantage over generic training programs. By focusing on progressive overload, strict time-under-tension, and optimal joint alignment during band tricep pushdown, you eliminate common biomechanical bottlenecks and accelerate your body natural recovery capacity. Ensure that every repetition or static hold is performed with deliberate breathing and full range of motion to capture 100% of the anatomical benefits.
The Rope-Split Bottom Spread & Squeeze
To fully execute The Rope-Split Bottom Spread & Squeeze effectively, you must maintain uncompromised technical discipline and understand the underlying physiological mechanism. Splitting hands 6 inches outward past your hips at bottom lockout to double outer horseshoe electrical muscle firing. When executed consistently over a 60-to-90-day training cycle, this specific protocol forces profound structural adaptation, strengthening the surrounding connective tissues, improving localized vascularity, and enhancing neuromuscular coordination across the target muscle groups.
Furthermore, integrating The Rope-Split Bottom Spread & Squeeze into your daily routine provides a direct competitive advantage over generic training programs. By focusing on progressive overload, strict time-under-tension, and optimal joint alignment during band tricep pushdown, you eliminate common biomechanical bottlenecks and accelerate your body natural recovery capacity. Ensure that every repetition or static hold is performed with deliberate breathing and full range of motion to capture 100% of the anatomical benefits.
Banded Overhead Extensions: Stretching the Massive Long Head Belly
Because the triceps long head accounts for two-thirds of your upper arm volume and crosses both the shoulder and elbow joints, pushdowns alone will not maximize total arm size. You must stretch the long head using Anchored Band Overhead Extensions. Secure your power band over your top door anchor or low furniture anchor.
For Top-Anchored Overhead Extensions: stand facing away from your door anchor with your back to the door. Reach behind your head and grasp the power band loop with both hands over your shoulders. Step forward 3 feet into a staggered lunge stance so the band stretches tightly across your upper back. Keeping your upper arms frozen pointing straight forward alongside your ears, press the band straight out in front of your face until both elbows lock out. Lower slowly over 4 seconds until your hands drop deep behind your neck, feeling an extreme stretch running across the back of your arm from armpit to elbow before driving back out.
Facing-Away Door Anchor Setup Geometry
To fully execute Facing-Away Door Anchor Setup Geometry effectively, you must maintain uncompromised technical discipline and understand the underlying physiological mechanism. Stepping 3 feet away from the door to create constant baseline elastic tension across the long head throughout the entire rep. When executed consistently over a 60-to-90-day training cycle, this specific protocol forces profound structural adaptation, strengthening the surrounding connective tissues, improving localized vascularity, and enhancing neuromuscular coordination across the target muscle groups.
Furthermore, integrating Facing-Away Door Anchor Setup Geometry into your daily routine provides a direct competitive advantage over generic training programs. By focusing on progressive overload, strict time-under-tension, and optimal joint alignment during band tricep pushdown, you eliminate common biomechanical bottlenecks and accelerate your body natural recovery capacity. Ensure that every repetition or static hold is performed with deliberate breathing and full range of motion to capture 100% of the anatomical benefits.
Stationary Vertical Upper-Arm Enforcement
To fully execute Stationary Vertical Upper-Arm Enforcement effectively, you must maintain uncompromised technical discipline and understand the underlying physiological mechanism. Locking upper arms beside your ears so 100 percent of the forward pushing work is performed by elbow extension alone. When executed consistently over a 60-to-90-day training cycle, this specific protocol forces profound structural adaptation, strengthening the surrounding connective tissues, improving localized vascularity, and enhancing neuromuscular coordination across the target muscle groups.
Furthermore, integrating Stationary Vertical Upper-Arm Enforcement into your daily routine provides a direct competitive advantage over generic training programs. By focusing on progressive overload, strict time-under-tension, and optimal joint alignment during band tricep pushdown, you eliminate common biomechanical bottlenecks and accelerate your body natural recovery capacity. Ensure that every repetition or static hold is performed with deliberate breathing and full range of motion to capture 100% of the anatomical benefits.
The 4-Second Negative Stretch & Sarcomere Addition
To fully execute The 4-Second Negative Stretch & Sarcomere Addition effectively, you must maintain uncompromised technical discipline and understand the underlying physiological mechanism. Lowering over 4 seconds and pausing behind your neck to maximize stretch-mediated hypertrophy across the long head belly. When executed consistently over a 60-to-90-day training cycle, this specific protocol forces profound structural adaptation, strengthening the surrounding connective tissues, improving localized vascularity, and enhancing neuromuscular coordination across the target muscle groups.
Furthermore, integrating The 4-Second Negative Stretch & Sarcomere Addition into your daily routine provides a direct competitive advantage over generic training programs. By focusing on progressive overload, strict time-under-tension, and optimal joint alignment during band tricep pushdown, you eliminate common biomechanical bottlenecks and accelerate your body natural recovery capacity. Ensure that every repetition or static hold is performed with deliberate breathing and full range of motion to capture 100% of the anatomical benefits.
Banded Tricep Kickbacks: Isolating the Peak Contraction Lockout
To carve out razor-sharp striations and three-dimensional detail across the outer horseshoe, the Banded Tricep Kickback is unrivaled. When executed with free weights, dumbbell kickbacks have almost zero resistance at the bottom 90-degree start position and maximum resistance only for a split second at the top horizontal lockout. A resistance band anchored to a low doorframe or held under your foot fixes this flaw completely, providing smooth, ascending resistance across the entire arc.
Step your right foot squarely onto the center of a light-to-medium resistance band loop (or anchor it to the bottom edge of your closed door). Hold the top loop of the band in your right hand. Hinge your hips backward at 45 degrees, row your right elbow up high until your upper arm bone is locked perfectly parallel to the floor alongside your ribs, and freeze your upper arm motionless. Drive your right hand straight backward behind you against the stretching band until your elbow locks straight out. Hold this peak backward contraction motionless for 2 strict seconds — your tricep will cramp with intense metabolic stress. Complete 15 reps per arm.

Foot-Anchor vs. Low-Door-Anchor Kickback Setup
To fully execute Foot-Anchor vs. Low-Door-Anchor Kickback Setup effectively, you must maintain uncompromised technical discipline and understand the underlying physiological mechanism. Securing the band under your front arch to create smooth, non-slipping kickback tension that escalates to peak contraction. When executed consistently over a 60-to-90-day training cycle, this specific protocol forces profound structural adaptation, strengthening the surrounding connective tissues, improving localized vascularity, and enhancing neuromuscular coordination across the target muscle groups.
Furthermore, integrating Foot-Anchor vs. Low-Door-Anchor Kickback Setup into your daily routine provides a direct competitive advantage over generic training programs. By focusing on progressive overload, strict time-under-tension, and optimal joint alignment during band tricep pushdown, you eliminate common biomechanical bottlenecks and accelerate your body natural recovery capacity. Ensure that every repetition or static hold is performed with deliberate breathing and full range of motion to capture 100% of the anatomical benefits.
Stationary Upper-Arm Parallel Rule
To fully execute Stationary Upper-Arm Parallel Rule effectively, you must maintain uncompromised technical discipline and understand the underlying physiological mechanism. Keeping your upper arm bone frozen parallel to the floor during kickbacks so only the forearm pivots backward to lock out. When executed consistently over a 60-to-90-day training cycle, this specific protocol forces profound structural adaptation, strengthening the surrounding connective tissues, improving localized vascularity, and enhancing neuromuscular coordination across the target muscle groups.
Furthermore, integrating Stationary Upper-Arm Parallel Rule into your daily routine provides a direct competitive advantage over generic training programs. By focusing on progressive overload, strict time-under-tension, and optimal joint alignment during band tricep pushdown, you eliminate common biomechanical bottlenecks and accelerate your body natural recovery capacity. Ensure that every repetition or static hold is performed with deliberate breathing and full range of motion to capture 100% of the anatomical benefits.
The 2-Second Peak Horizontal Squeeze
To fully execute The 2-Second Peak Horizontal Squeeze effectively, you must maintain uncompromised technical discipline and understand the underlying physiological mechanism. Pausing motionless at top leg/arm extension where elastic tension is highest to force maximum myofibrillar recruitment. When executed consistently over a 60-to-90-day training cycle, this specific protocol forces profound structural adaptation, strengthening the surrounding connective tissues, improving localized vascularity, and enhancing neuromuscular coordination across the target muscle groups.
Furthermore, integrating The 2-Second Peak Horizontal Squeeze into your daily routine provides a direct competitive advantage over generic training programs. By focusing on progressive overload, strict time-under-tension, and optimal joint alignment during band tricep pushdown, you eliminate common biomechanical bottlenecks and accelerate your body natural recovery capacity. Ensure that every repetition or static hold is performed with deliberate breathing and full range of motion to capture 100% of the anatomical benefits.
The Complete 30-Minute Resistance Band Arm Master Routine
To assemble these specialized elastic resistance movements into an elite home upper arm conditioning session, execute this complete 30-minute routine exactly 2 days per week (for example, Tuesday and Friday). You will need one long 41-inch power loop band (purple or black) and your sturdy bedroom door with a door anchor.
Master Routine Flow: Exercise 1: Top-Anchored Band Pushdowns (Rope-Split Style) — 4 sets of 15 strict reps splitting hands outward at bottom with 2-second squeeze (rest 60s); Exercise 2: Top-Anchored Band Overhead Extensions (facing away from door) — 4 sets of 12 strict reps lowering behind neck over 4 seconds into deep stretch (rest 60s); Exercise 3: Reverse Underhand Band Pushdowns — 4 sets of 15 reps targeting the medial head (rest 60s); Exercise 4: Unilateral Banded Tricep Kickbacks — 3 sets of 15 reps per arm holding 2-second peak horizontal lockout (rest 45s between arms). Your upper arms will achieve astonishing vascularity and horseshoe separation.

Chronological 4-Exercise Elastic Arm Flow
To fully execute Chronological 4-Exercise Elastic Arm Flow effectively, you must maintain uncompromised technical discipline and understand the underlying physiological mechanism. Combining rope-split pushdowns, overhead stretches, underhand medial pushdowns, and peak kickback burnouts. When executed consistently over a 60-to-90-day training cycle, this specific protocol forces profound structural adaptation, strengthening the surrounding connective tissues, improving localized vascularity, and enhancing neuromuscular coordination across the target muscle groups.
Furthermore, integrating Chronological 4-Exercise Elastic Arm Flow into your daily routine provides a direct competitive advantage over generic training programs. By focusing on progressive overload, strict time-under-tension, and optimal joint alignment during band tricep pushdown, you eliminate common biomechanical bottlenecks and accelerate your body natural recovery capacity. Ensure that every repetition or static hold is performed with deliberate breathing and full range of motion to capture 100% of the anatomical benefits.
Explosive Concentric & Slow Eccentric Tempo Rules
To fully execute Explosive Concentric & Slow Eccentric Tempo Rules effectively, you must maintain uncompromised technical discipline and understand the underlying physiological mechanism. Driving down fast against ascending elastic pull while lowering slowly over 3 seconds to control band recoil forces. When executed consistently over a 60-to-90-day training cycle, this specific protocol forces profound structural adaptation, strengthening the surrounding connective tissues, improving localized vascularity, and enhancing neuromuscular coordination across the target muscle groups.
Furthermore, integrating Explosive Concentric & Slow Eccentric Tempo Rules into your daily routine provides a direct competitive advantage over generic training programs. By focusing on progressive overload, strict time-under-tension, and optimal joint alignment during band tricep pushdown, you eliminate common biomechanical bottlenecks and accelerate your body natural recovery capacity. Ensure that every repetition or static hold is performed with deliberate breathing and full range of motion to capture 100% of the anatomical benefits.
Band Care & Inspection Safety Checklist
To fully execute Band Care & Inspection Safety Checklist effectively, you must maintain uncompromised technical discipline and understand the underlying physiological mechanism. Inspecting bands for micro-tears before every workout to prevent snapping and ensure smooth, consistent resistance. When executed consistently over a 60-to-90-day training cycle, this specific protocol forces profound structural adaptation, strengthening the surrounding connective tissues, improving localized vascularity, and enhancing neuromuscular coordination across the target muscle groups.
Furthermore, integrating Band Care & Inspection Safety Checklist into your daily routine provides a direct competitive advantage over generic training programs. By focusing on progressive overload, strict time-under-tension, and optimal joint alignment during band tricep pushdown, you eliminate common biomechanical bottlenecks and accelerate your body natural recovery capacity. Ensure that every repetition or static hold is performed with deliberate breathing and full range of motion to capture 100% of the anatomical benefits.
Indian High-Protein Nutrition for Elastic Band Arm Remodeling
Because resistance band circuits provide ascending tension that overloads your triceps at peak contraction, they induce high rates of localized metabolic stress and cellular micro-trauma across massive upper arm tissue beds. If your daily protein and carbohydrate intake falls short, your arms will remain chronically fatigued and fail to add visible circumference.
Within 45 minutes post-workout, consume a large recovery shake: 300ml whole milk blended with 1.5 scoops of whey protein, 2 bananas, and 1 tablespoon of peanut butter (delivering 45g complete protein and simple sugars to halt catabolism instantly). For dinner, consume 300g of organic homemade paneer curry or chicken breast paired with 3 cups of white rice, yellow dal, and fresh green spinach (palak) to fully replenish intramuscular glycogen and drive rapid tricep horseshoe expansion overnight.

The 45-Minute Post-Workout Whey & Banana Shake
To fully execute The 45-Minute Post-Workout Whey & Banana Shake effectively, you must maintain uncompromised technical discipline and understand the underlying physiological mechanism. Shuttling fast-absorbing whey protein and simple sugars into damaged tricep fibers within the peak anabolic window. When executed consistently over a 60-to-90-day training cycle, this specific protocol forces profound structural adaptation, strengthening the surrounding connective tissues, improving localized vascularity, and enhancing neuromuscular coordination across the target muscle groups.
Furthermore, integrating The 45-Minute Post-Workout Whey & Banana Shake into your daily routine provides a direct competitive advantage over generic training programs. By focusing on progressive overload, strict time-under-tension, and optimal joint alignment during band tricep pushdown, you eliminate common biomechanical bottlenecks and accelerate your body natural recovery capacity. Ensure that every repetition or static hold is performed with deliberate breathing and full range of motion to capture 100% of the anatomical benefits.
High-Calorie Paneer & White Rice Dinner Matrix
To fully execute High-Calorie Paneer & White Rice Dinner Matrix effectively, you must maintain uncompromised technical discipline and understand the underlying physiological mechanism. Utilizing traditional Indian dairy protein paired with easily digestible white rice to completely restore upper arm glycogen. When executed consistently over a 60-to-90-day training cycle, this specific protocol forces profound structural adaptation, strengthening the surrounding connective tissues, improving localized vascularity, and enhancing neuromuscular coordination across the target muscle groups.
Furthermore, integrating High-Calorie Paneer & White Rice Dinner Matrix into your daily routine provides a direct competitive advantage over generic training programs. By focusing on progressive overload, strict time-under-tension, and optimal joint alignment during band tricep pushdown, you eliminate common biomechanical bottlenecks and accelerate your body natural recovery capacity. Ensure that every repetition or static hold is performed with deliberate breathing and full range of motion to capture 100% of the anatomical benefits.
Creatine Monohydrate for Upper Arm Sarcoplasmic Volume
To fully execute Creatine Monohydrate for Upper Arm Sarcoplasmic Volume effectively, you must maintain uncompromised technical discipline and understand the underlying physiological mechanism. Consuming 5 grams of daily creatine to pull water volume directly into all three tricep heads, adding immediate visible arm size. When executed consistently over a 60-to-90-day training cycle, this specific protocol forces profound structural adaptation, strengthening the surrounding connective tissues, improving localized vascularity, and enhancing neuromuscular coordination across the target muscle groups.
Furthermore, integrating Creatine Monohydrate for Upper Arm Sarcoplasmic Volume into your daily routine provides a direct competitive advantage over generic training programs. By focusing on progressive overload, strict time-under-tension, and optimal joint alignment during band tricep pushdown, you eliminate common biomechanical bottlenecks and accelerate your body natural recovery capacity. Ensure that every repetition or static hold is performed with deliberate breathing and full range of motion to capture 100% of the anatomical benefits.

Resistance Band Tricep – Frequently Asked Questions (FAQs) About Band Tricep Pushdown
Can resistance band pushdowns really build as much tricep mass as a commercial gym cable machine?
Yes, absolutely. Muscle fibers do not know whether resistance comes from a metal cable weight stack or stretching rubber elastic bands; they respond purely to mechanical tension and time-under-tension. Because bands provide linear variable resistance that overloads peak contraction, they build elite upper arm density at home. By strictly following the biomechanical principles and nutritional guidelines detailed in this guide on band tricep pushdown, you can safely achieve rapid, noticeable improvements while protecting your long-term joint health.
Which resistance band colors should I buy for an effective home tricep workout?
For complete home arm training, invest in one long 41-inch power band in Purple (15-35kg resistance) or Black (10-25kg resistance) for pushdowns and overhead extensions, plus a Red (5-15kg resistance) band for strict single-arm kickbacks. By strictly following the biomechanical principles and nutritional guidelines detailed in this guide on band tricep pushdown, you can safely achieve rapid, noticeable improvements while protecting your long-term joint health.
Why does the resistance band snap back or hurt my wrists during top-anchored pushdowns?
Band snap-back occurs when you release your downward grip too quickly at the bottom of the repetition. Always lower the band under strict 3-second negative control, and wrap a small washcloth around the band loop where you place your palms to eliminate wrist skin friction. By strictly following the biomechanical principles and nutritional guidelines detailed in this guide on band tricep pushdown, you can safely achieve rapid, noticeable improvements while protecting your long-term joint health.
How do I make band pushdowns harder once the purple power band feels too easy?
You can instantly overload your band pushdowns without buying a new band by using the Rope-Split technique (spreading your hands 6 inches wide outward past your hips at bottom lockout), or by stepping 2 feet further back away from the door anchor to increase baseline band stretch. By strictly following the biomechanical principles and nutritional guidelines detailed in this guide on band tricep pushdown, you can safely achieve rapid, noticeable improvements while protecting your long-term joint health.
Can I anchor my resistance band over any standard bedroom door safely?
Yes, but always use a dedicated heavy-duty foam Door Anchor strap slipped over the top hinge-side corner of the door, and ensure the door is locked shut pulling toward the frame face so the door cannot swing open accidentally during heavy pushdowns. By strictly following the biomechanical principles and nutritional guidelines detailed in this guide on band tricep pushdown, you can safely achieve rapid, noticeable improvements while protecting your long-term joint health.